
Building a Home Lab Part 2b - Installing The First VM
We created the VM. Now let us put something useful on it.

Today’s home lab guide will show you how to put Ubuntu Server on the first VM we created from Part 2.
This one will be short, sweet, and to the point. You’ll be just fine as long as you can follow along with pictures.
The machine I was using for my home lab went down :(
I’ll be working on building a new one…
Step 1: Start the Virtual Machine
Right click on the newly created VM and select “Start”.

Click on “Console” in the side menu directly to the left. You’ll see a console that asks if you want to install Ubuntu Server or test the memory. Hit “Enter” on your keyboard to begin the installation:

Step 2: Configure Settings
Select your language. English will be the default. Use the arrow keys to select your language and hit ‘ENTER’ to continue.

Select your Keyboard layout. Hit ‘ENTER’ with ‘Done’ selected to continue.

We have two options for the installation base. We will choose the first option. Use the ‘Tab’ key until ‘Done’ is selected and hit ‘ENTER’.

Next is the configuration of networking settings. Wait for the DHCPv4 line to fill in with an IP address. Make sure ‘Done’ is selected and hit ‘ENTER’.

Keep the defaults. Hit tab on your keyboard until ‘Done’ is hovered. Hit ‘ENTER’.

Keep all the defaults on this page. Select ‘Done’ and hit ‘ENTER’ to continue.

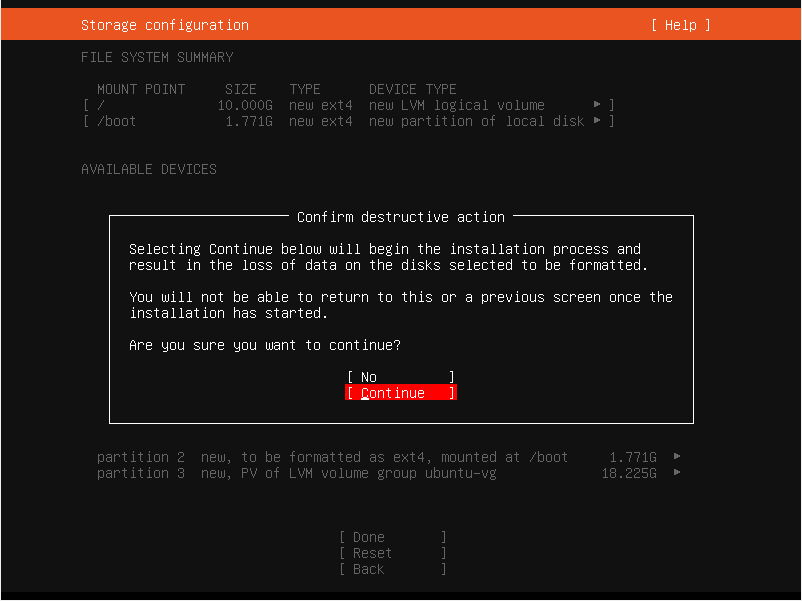
You will be prompted about destructive action. Select ‘Continue’ and hit ‘ENTER’.
Now you will set up a username and a password. Remember the password because you’ll need it to sign in soon.
Hit the tab key to move between the input boxes. Select ‘Done’ and hit ‘ENTER’ to proceed.

Hit ‘Space’ on your keyboard to select the ‘Install OpenSSH server’ option. Leave the rest as defaults. Select ‘Done’ and continue.

If the installation starts looking for third party drives, hit ENTER to continue until you see the below screenshot.
Do not select any of the featured server snaps. Hit tab to select ‘Done’ and continue.

Next is the waiting game. Ubuntu will now install and run some updates. This may take upwards of 20 minutes. You will know that it is done when the menu option changes to ‘Reboot Now’.
Hit ‘ENTER’ once ‘Reboot Now’ shows.

A bunch of items will start running down the screen. Eventually it will stop and you’ll be prompted to remove the installation medium.
Just hit ‘ENTER’ and the machine will finish rebooting.

And just like that you have a new Ubuntu Server installation set up. It just took a lot of hitting tab, space, and enter.
Wait for the machine to finish rebooting.
Step 3: Finish Updating the Machine
You will end up at a screen that looks like this. You might have to hit ‘ENTER’ on your keyboard to get the wireguard login prompt.
Type your username and hit ‘ENTER’. Then type in your password and hit ‘ENTER’. Your password will not show while you type it.

Once logged in type sudo apt update && sudo apt upgrade -y
It will prompt you for a sudo password. The sudo password is the same as the password you used to login.
After you hit ‘ENTER’ to submit the password, the update will begin. You may get prompted with a box that looks like this:

Hit tab so ‘Ok’ is highlighted. Then hit ‘ENTER’.
Summary
Now you have a fully up to date and fresh Ubuntu Server 22 installation. The fun starts now with installing services on it we can actually use.
In the next issue we will install wireguard VPN and learn how we can remote into our network from anywhere.
Stay tuned :^)